Installing a printer driver through Windows Update is not a difficult task. You can do it easily by following the below steps. Here in this article, we’ll show you how to install a printer driver through Windows Update in Windows 7, 8, 8.1, 10. Let’s go to the steps directly and follow the instructions given there.
Although you could download & install printer driver through its driver pack which is available on their official website, but sometimes the drivers are not available for some particular model number printers or specific operating systems. In this case, we’ll have to get the printer driver from Windows Update.
Advertisement
How to install a printer driver through Windows Update
These steps could be applied for USB connectivity, Wi-Fi Connectivity, LPT cable (parallel cable connectivity). Follow the following steps.
Steps:
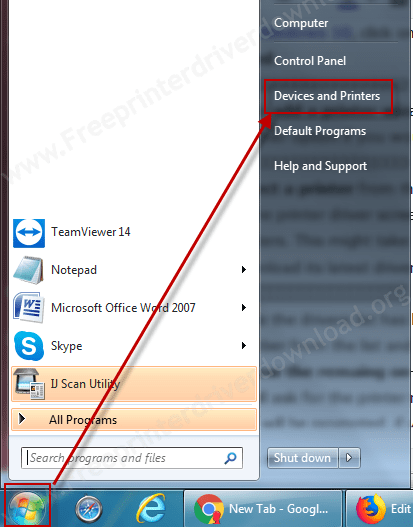
- Open Printers Page.
For Windows 7, Vista, XP, Click on Start menu → Devices & Printers.
For Windows 108, 8.1, click on Start Menu → settings → devices → printers & scanner.

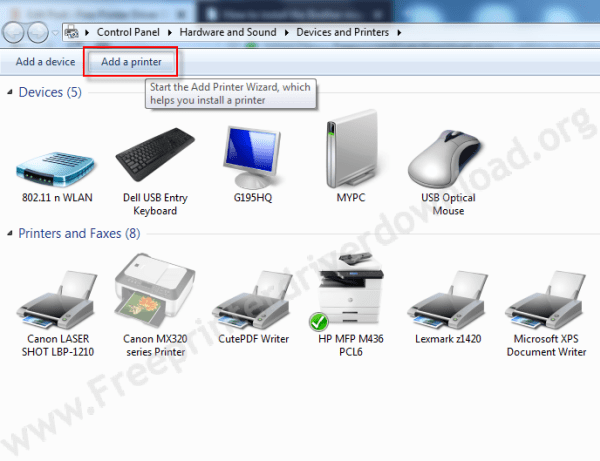
- Click on Add a Printer.
For Windows 10, click on Add a printer or scanner → The printer that I want isn’t listed.

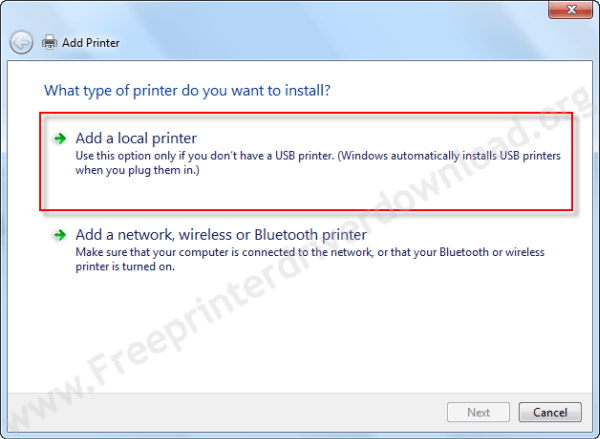
- Once add a printer wizard appears, click on “Add a local printer“. You may choose another option if you would like to “Add a network or wireless printer” or anything else.

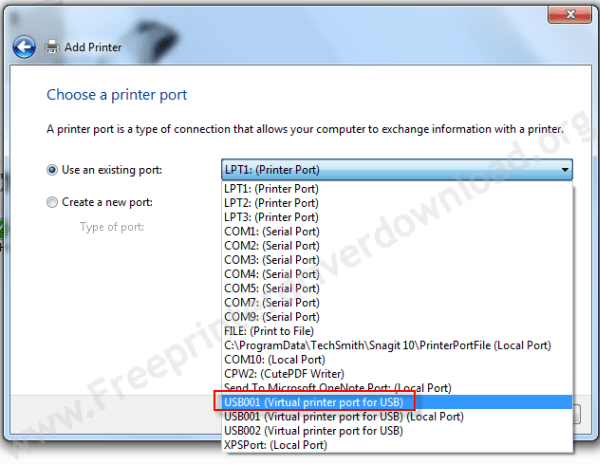
- Select the port “USB001 or USB002 or USB003” where your printer is connected right now. If you won’t see these three ports in the list, it means your computer is not detecting your printer. Double-check the connection.
For Network printers, select the printer from the searched list.

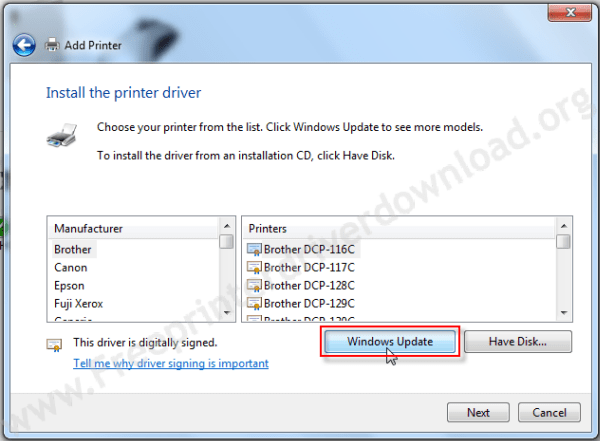
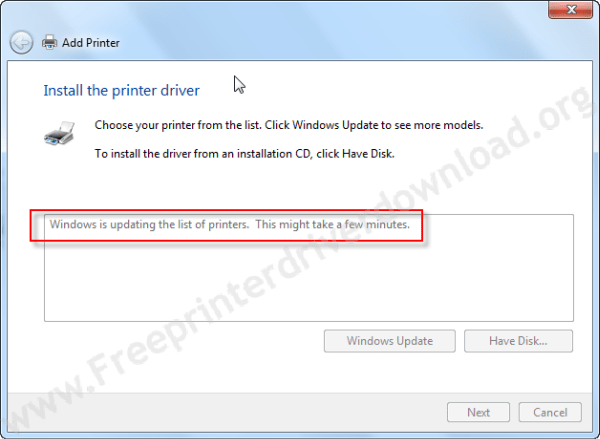
- In the printer driver screen, click on Windows Update. The Windows is updating the list of printers. It might take a few minutes to connect to the Microsoft server and then download its latest driver.


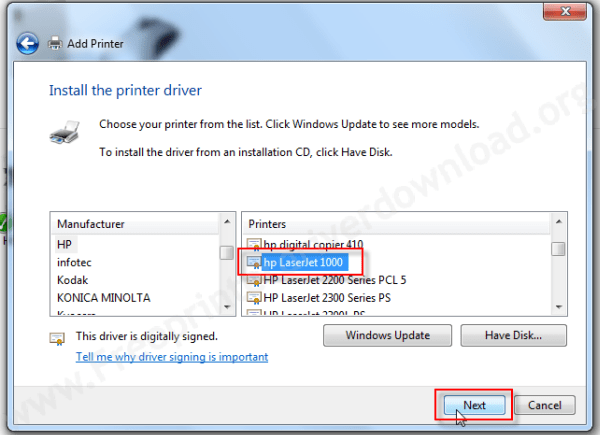
- Once the driver’s list has been updated with the new drivers, select your printer’s model number from the list and then click on Next.

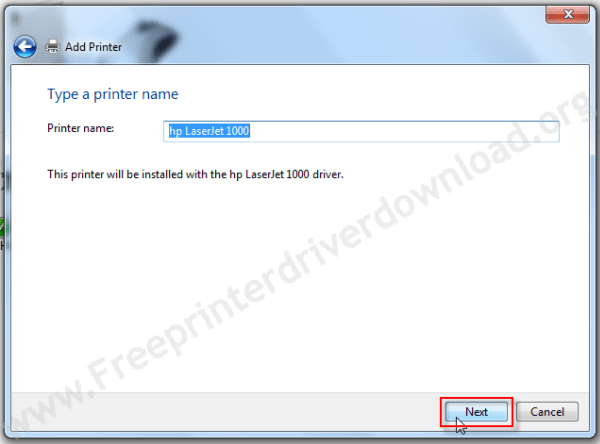
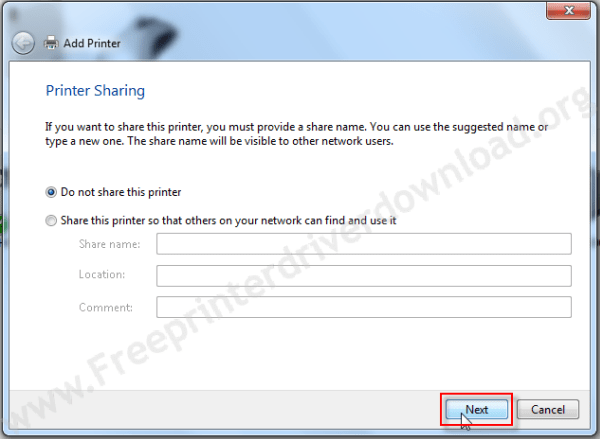
- It will ask for the printer name, give the name and then click on Next button.


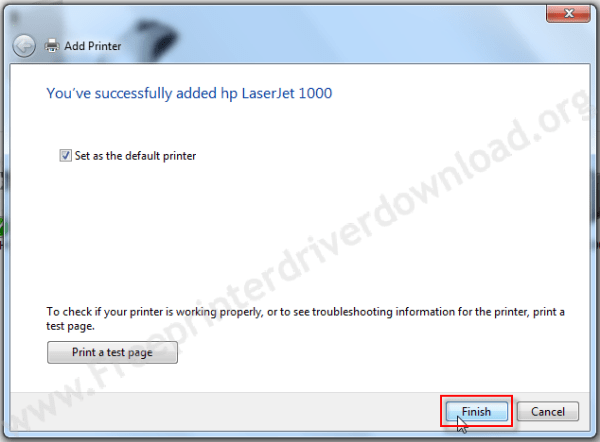
- You will be prompted, would you like to set this printer as a default printer whenever you print this will be seelcted by default. And print a test page to check the printer has been installed successfully or not. Set the settings according to your need and then click on Finish.

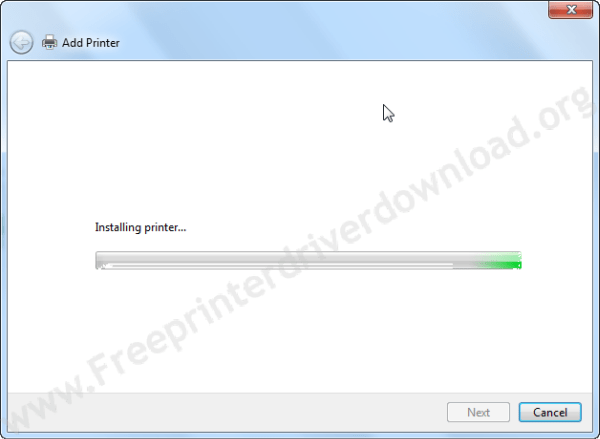
- After that, your printer will be installed successfully.
If you face any problem while following the above steps, then let us know in the comments, and questions & answers down below. We’ll be happy to answer you there.


Thanks sir g for helping us.
You’re most welcome!!