Finding the right HP Color LaserJet Pro MFP M476nw driver is a tough task for many users. On this page you will find the download links for HP LaserJet Pro M476nw drivers that are suitable for use with their respective operating systems. Additionally, you will learn about the right way to install these drivers below, so please follow the below given instructions.
Learn, how to download HP Color LaserJet Pro MFP M476nw Driver from Internet?
If you want to download the right driver for your printer, then you must know the operating system running on your computer. Here you will find HP LaserJet Pro M476nw drivers for all major operating systems. All you need to do is to select your desired operating system from the list and download the HP Color LaserJet M476nw driver associated with that operating system.
Advertisement
HP Color LaserJet Pro MFP M476nw Driver Downward Link
- HP LaserJet Pro M476nw Driver Download for Windows XP (32bit)
- HP LaserJet Pro M476nw Driver Download for Windows XP (64bit)
- HP LaserJet Pro M476nw Driver Download for Windows Vista (32bit)
- HP LaserJet Pro M476nw Driver Download for Windows Vista (64bit)
- HP LaserJet Pro M476nw Driver Download for Windows 7 (32bit)
- HP LaserJet Pro M476nw Driver Download for Windows 7 (64bit)
- HP LaserJet Pro M476nw Driver Download for Windows 8 (32bit)
- HP LaserJet Pro M476nw Driver Download for Windows 8 (64bit)
- HP LaserJet Pro M476nw Driver Download for Windows 8.1 (32bit)
- HP LaserJet Pro M476nw Driver Download for Windows 8.1 (64bit)
- HP LaserJet Pro M476nw Driver Download for Windows 10 (32bit)
- HP LaserJet Pro M476nw Driver Download for Windows 10 (64bit)
- HP LaserJet Pro M476nw Driver Download for Windows 11 (64bit)
- HP LaserJet Pro M476nw
Driver Downloadfor Server 2000 (32bit)
“Drivers are not available on HP official website, either the drivers are inbuilt in the operating system or the printer does not support these operating systems: Server 2000, Linux” - HP LaserJet Pro M476nw Driver Download for Server 2003 (32bit)
- HP LaserJet Pro M476nw Driver Download for Server 2003 (64bit)
- HP LaserJet Pro M476nw Driver Download for Server 2008 (32bit)
- HP LaserJet Pro M476nw Driver Download for Server 2008 (64bit) / R2
- HP LaserJet Pro M476nw Driver Download for Server 2012 (32bit)
- HP LaserJet Pro M476nw Driver Download for Server 2012 (64bit) / R2
- HP LaserJet Pro M476nw Driver Download for Server 2016 (64bit)
- HP LaserJet Pro M476nw Driver Download for Server 2019, 2022 (64bit)
- HP LaserJet Pro M476nw Driver Download for Apple Mac v10.6, 10.7, 10.8, 10.9, 10.10, 10.11 & 10.12, 10.13, 10.14, 10.15, 11.x, 12.x, 13.x
- HP LaserJet Pro M476nw driver for Linux and Ubuntu – Download – Know more
- Click here to go to >> Direct official HP LaserJet Pro M476nw Printer Driver Download Page
HP Color LaserJet Pro MFP M476nw Printer Images
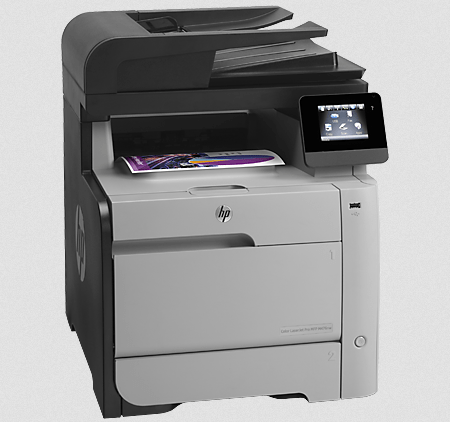
HP Color LaserJet Pro MFP M476nw printer Description
This HP Color LaserJet Pro is a great MFP for the whole office. It offers fast and vibrant color prints with versatile scans. Its wireless printing feature allows you to access all its functions from anywhere. This highly productive MFP is designed to handle workloads of three to ten person teams.
HP Color LaserJet Pro MFP M476nw Features
The 50-page automatic document feeder of this MFP allows you to finish your printing projects in lesser time. The single-pass, dual-head scanning feature of this device finishes your work faster, which means less standing around. Additionally, after scanning you can send documents directly to the cloud, network folders or email.
You can easily access all the features of this MFP from its 3.5-inch color touchscreen display control panel. Apart from the wireless printing feature, this device also has a USB port which can be used to print documents directly from your USB drive.
HP Color LaserJet Pro MFP M476nw Specification
- Laser printing technology.
- Printer Processor of 800 MHz.
- Memory of 256 MB.
- Print quality of up to 600 x 600 dpi for both black and color prints.
- Monthly duty cycle of up to 40,000 pages.
HP Color LaserJet Pro MFP M476nw Ink Cartridge
This printer uses four print cartridges; one each of black, yellow, cyan and magenta color. Black color cartridge is available in two sizes: HP 312A LaserJet Cartridge (CF380A) with a yield of up to 2400 pages; and HP 312X LaserJet Cartridge (CF380X) with a yield of up to 4400 pages. All other colored toner cartridges are available in only one size: HP 312A Cyan LaserJet Cartridge (CF381A); HP 312A Yellow LaserJet Cartridge (CF382A); and HP 312A Magenta LaserJet Cartridge (CF383A). The page yield for each of these cartridges is approximately 2700 pages.
To Install Drivers:
Follow the following Instructions to install printer
- Double click on the Driver package of your choice after it’s downloaded. The installation will extract the files required to begin.
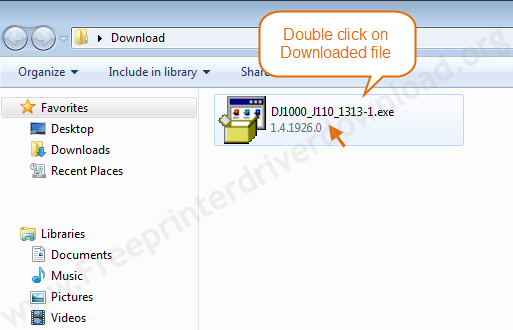
- The installation will now begin, so walk the Wizard prompts to install the drivers.


- Accept the Installation agreements.
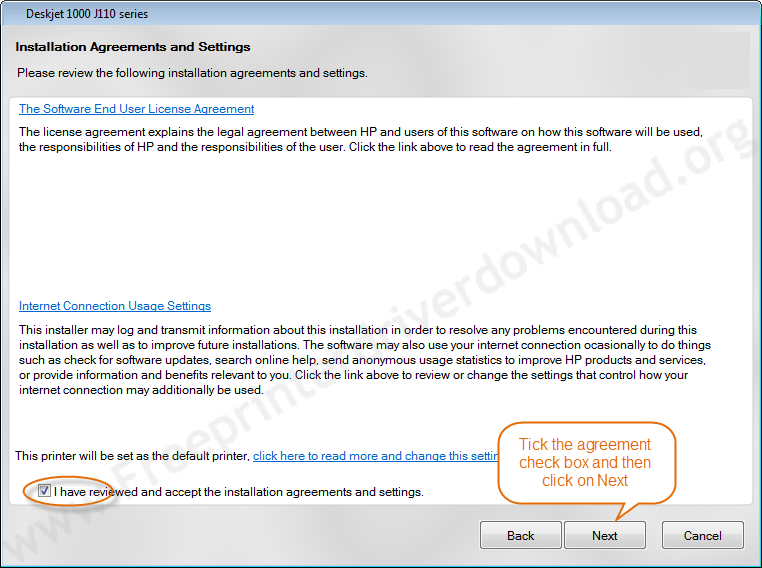


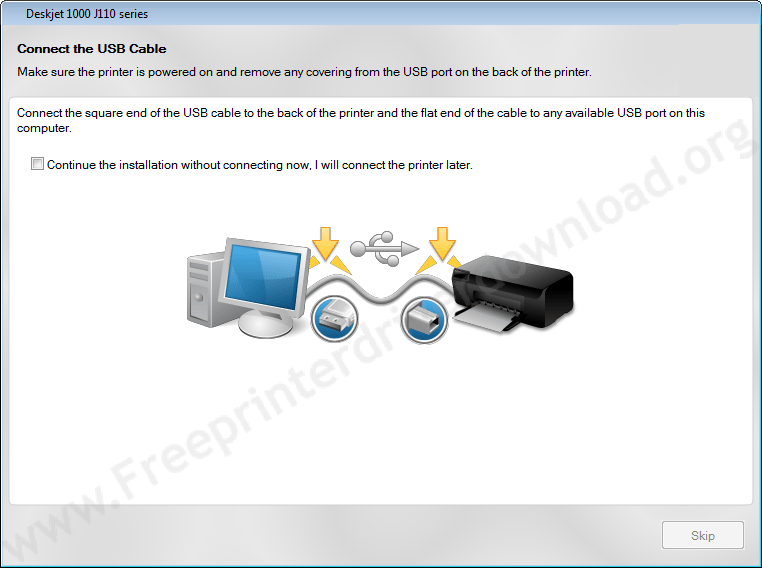
- Connect your printer to your computer when prompted to do so. (See below screenshot)
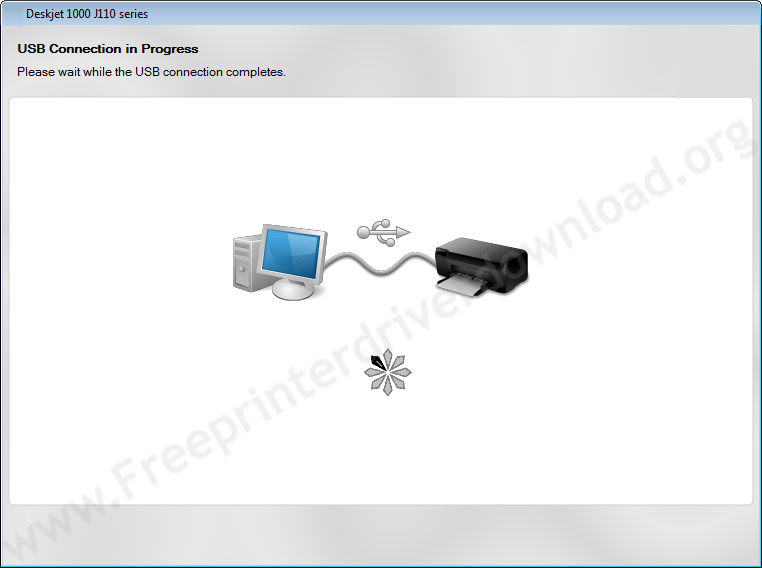
- Wait until detecting your printer.
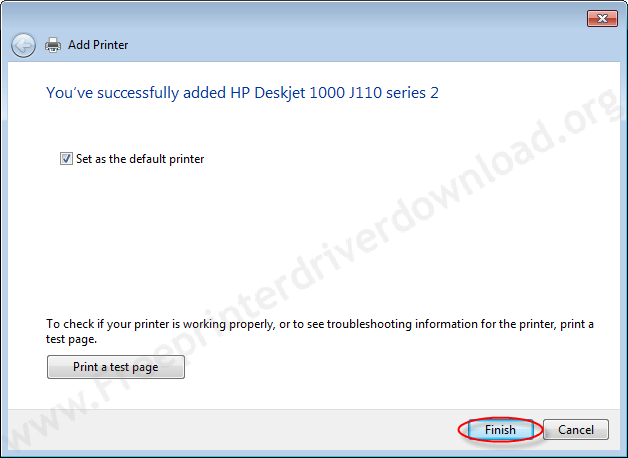
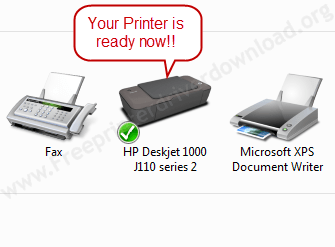
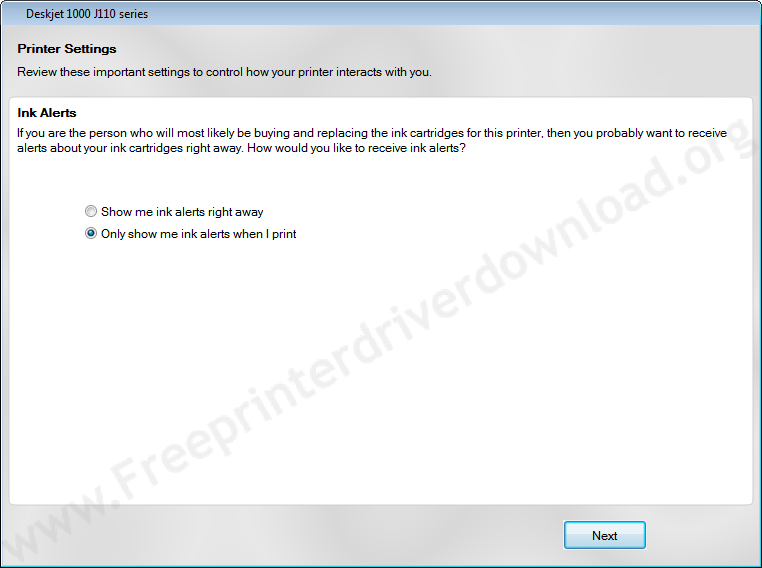
- Click on Next, now your printer is detected here if you get green tick mark.

- Click on Finish to complete installation.
To install drivers through CD:
Install the drivers for the HP LaserJet Pro MFP M476nw printer using a CD wizard:
- Turn on the printer by pressing the power button on it.
- Load the driver CD that came with your printer into your computer’s CD drive.
- The AutoPlay window will popup and prompt you to Install or run program from your media.
- Click on Run or execute the file named as Autorun.exe.
- Windows will ask you if you want to open the installer at which point you should click on Yes.
- Before the installation can continue, you need to review the agreements and then click on the checkbox next to “I have reviewed and accept the installation agreement“.
- You’ll now be promoted to click Next to begin installing the HP LaserJet Pro MFP M476nw printer drivers. The Installer will copy files from the CD and transfer them to your computer.
- A menu with a few choices will appear, so make sure you choose the way you want to connect the printer to your computer.
- Choose to either connect it through a wireless network, a wired network or using a USB cable.
- A window will then appear asking that you connect one end of the USB cable into your printer and the other into your laptop/computer.
- Your computer will find the printer (automatically) and then continue/next with the installation.
- Once the installation is complete, the installer will notify you about it.
- A window will appear saying the software was successfully installed, Click Finish.
To install drivers without CD:
Install the drivers for the HP LaserJet Pro MFP M476nw printer an Installation package:
You can install printer drivers even if you have lost your printer drivers CD. This is the method that you can install HP LaserJet Pro MFP M476nw printer without CD (disc).
Method1: to download driver
- Go to HP LaserJet Pro MFP M476nw official website and click on Download drivers button.
- Enter your printer name in the Find my product box.
- A series of results will appear, so make sure you select your specific printer model by clicking on it
- Choose your operating system that matches your version of Windows.
- Choose either the Basic Driver or Full Feature Driver. The Basic Driver package includes all the basic files required to use the printer. The Full Feature package includes extra software, such as maintenance programs, utilities and even photo editing apps.
Method2: to download driver
- You can download driver directly: Driver Download links are also given on the this page, you can download it from here directly. Scroll above and find out the driver download link.
Then follow the below given instructions to install HP LaserJet Pro MFP M476nw driver
- Click on the driver package and choose where you want to download it on your computer.
- Click Save and wait until the download is complete.
- Double click on the Driver package of your choice after it’s downloaded. The installation will extract the files required to begin.
- The installation will now begin, so walk the Wizard prompts to install the drivers.
- Accept Installation agreements.
- Connect your printer to your computer when prompted to do so.
- Click Finish to finish installing the drivers.
To install drivers manually:
Install the drivers for the HP LaserJet Pro MFP M476nw printer through “Add a printer” (Manually):
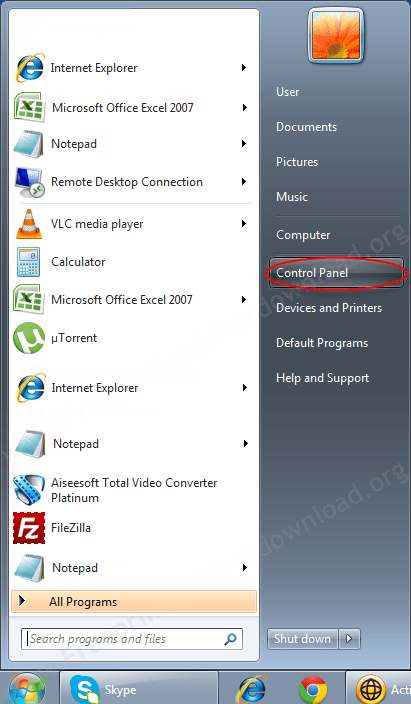
- Go to Start, Locate Control Panel on the right and click on it.
- Go to Hardware and Sound.
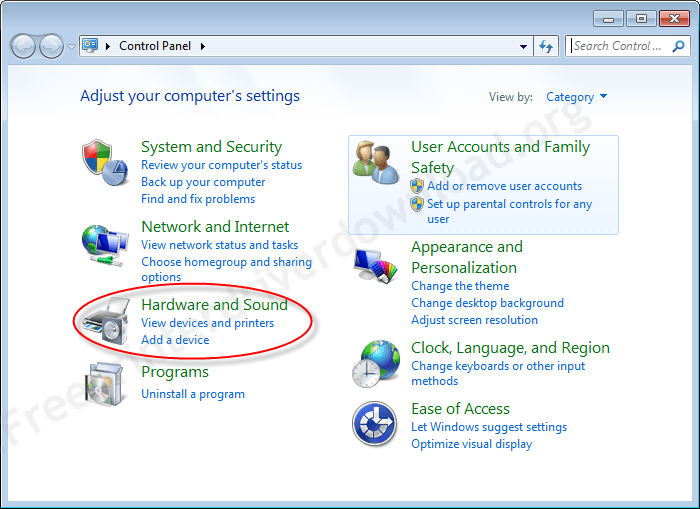
- Under Devices and Printers, click on Add printer.
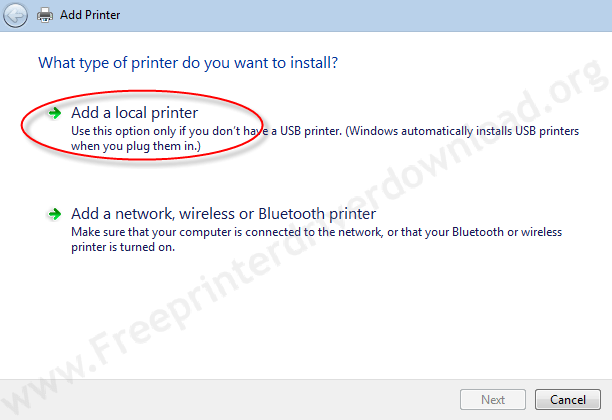
- Choose Add a local printer if you don’t have a USB printer listed in the list. That’s because Windows installs USB printers automatically as you plug them in.


- Choose a port for your printer.
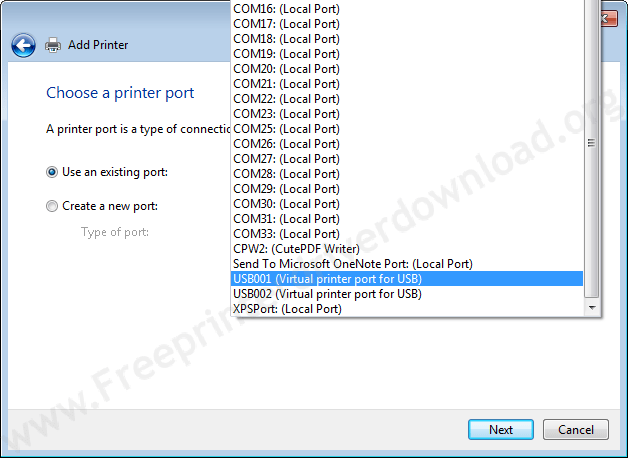

- Choose your printer from the list (including brand and model) and click Next. If you don’t find your printer drivers in this default list then you have to download drivers first and then extract them to temp folder then give that temp folder path in this “add a printer” installation wizard. click on have disk to choose driver manually from their extracted location.
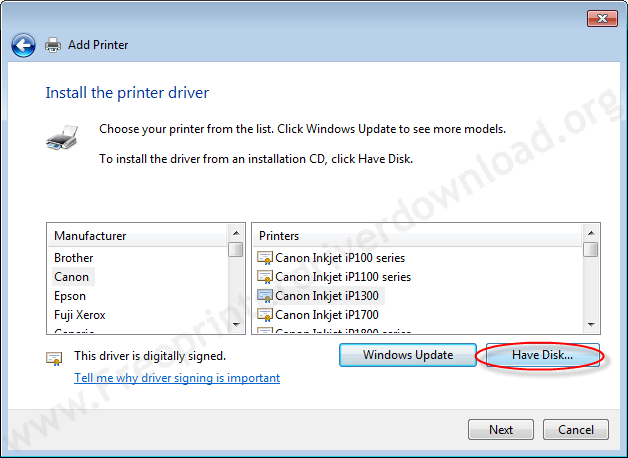
- Extract the printer drivers. Usually, drivers are automatically extract into temp folder path: %temp%. Some drivers are automatically extract in C drive or another path, it depends on the printer brand.


- This printer package extracting the driver’s file in temp folder. Usually, it extracts in temp folder.

- After click on “Have disk“, type “%temp%” in path field and then click on “browse“

- Browse will bring you in temp folder. Here, choose the package extracted folder and open it.

- Now choose the file named as “Autorun.inf” and open it. This file name may be vary, but the extension would be the same “.inf“.
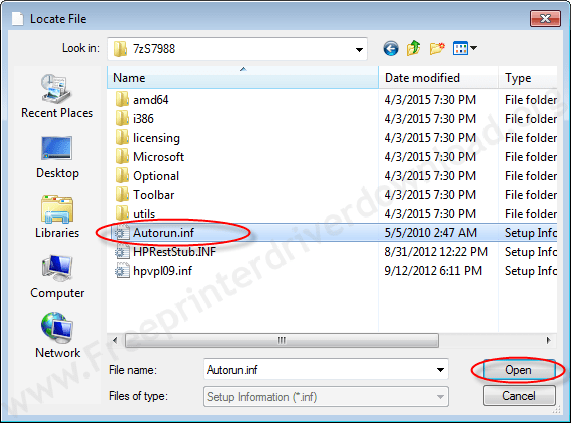
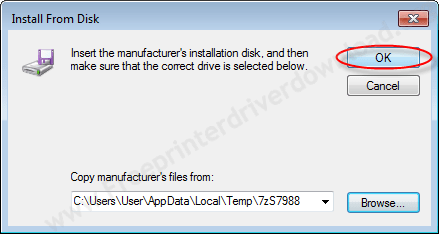
- After click on “Open”, you will bring back to “Install from disk” menu with full path. Now, Click on OK to get drivers.
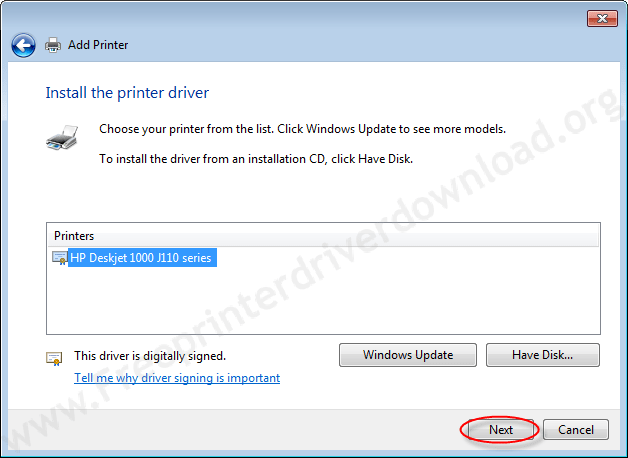
- Now, Click on NEXT
- If you get below screen, then you have to choose the second option (replace the current driver)
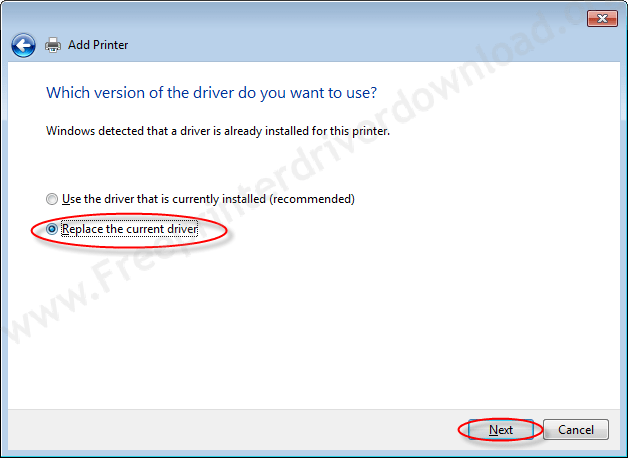
- Click on Next
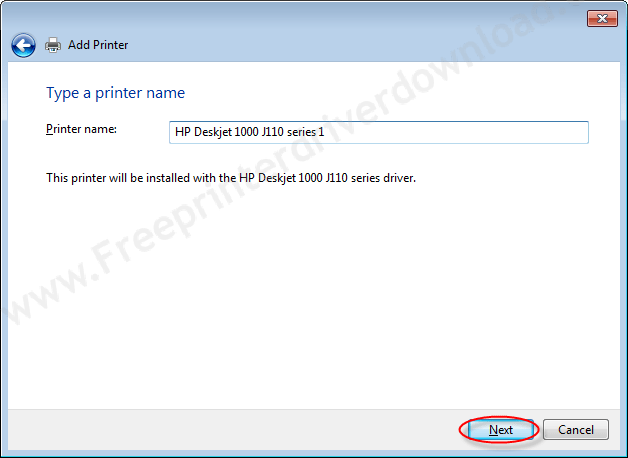
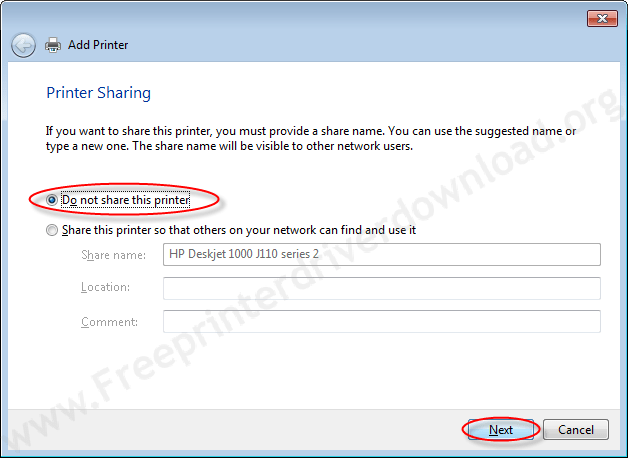
- Choose the option as per your requirement that you would like to share your printer to another computer or not. Then click on NEXT.
- Choose the option that “set your printer as default” and then click Finish.
