In this article, we are going to explain how to remove a printer driver completely from Windows 10, 8.1, 8, 7 computers.
Sometimes the printer driver may get corrupted due to many reasons. To fix this driver-corruption problem, you’ll have to reinstall the printer driver from scratch.
Advertisement
To properly reinstall it, uninstall the printer driver completely from your computer. Uninstalling the printer just from the control panel is not enough, you’ll have to uninstall the driver from the control panel, print management and system registry as well.

Let’s see how to do it.
How to Remove the printer driver completely from your computer
There are 3 steps that you’ll have to follow to remove the printer driver completely from your Windows 10, 7, 8:
- Uninstall Printer driver from Control Panel
- Remove Printer driver from Print Server
- Remove Printer driver from System Registry
Step 1: Uninstall printer driver from Control Panel
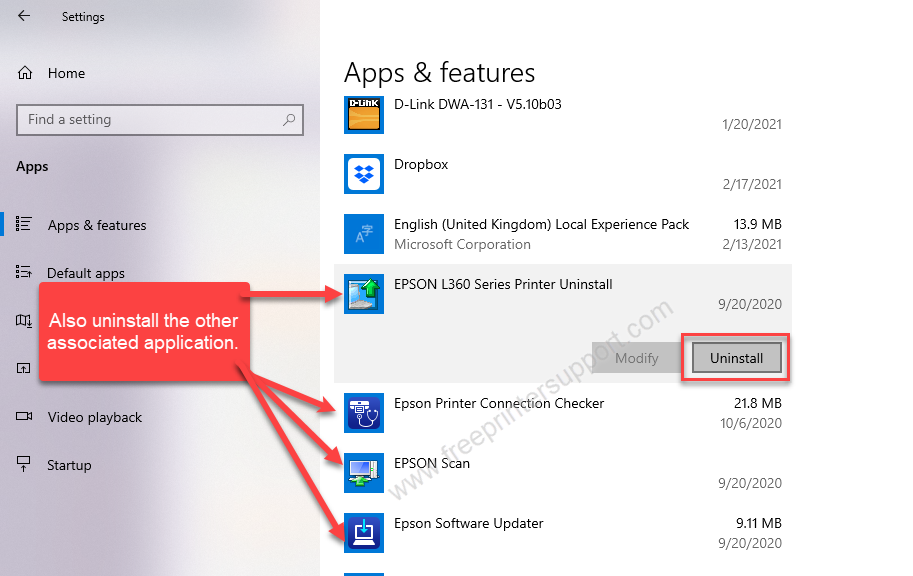
- Click on the Start menu and click on settings.

- Click on Apps. You’ll get all the installed applications listed here.

- Find and then select your printer model number from the list and click on uninstall.

- That’s it.
Step 2: Remove printer driver from Print Server
- Press the Windows + R key together to open the run box.
- In “Run” box, type services.msc and click OK to open the services page.

- In Services, find “Print Spooler” and then select it and click on “Stop the Service” to stop it. (We’ll start later after deleting the drivers)

- Come back to the desktop, and again press the Windows + R key together to open the run box.
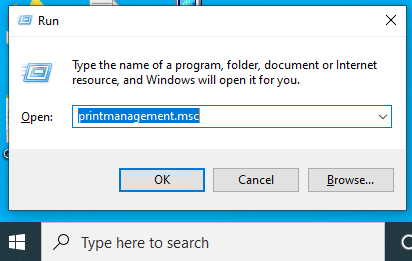
- Type the “printmanagement.msc” command in the run box and press OK button.

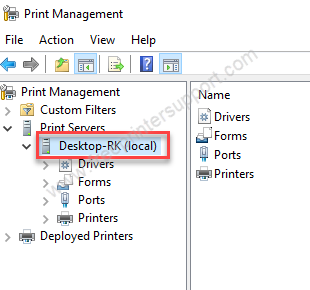
- Click on Print Server from the right side pane.

- Click on the computer name which is under the print server.

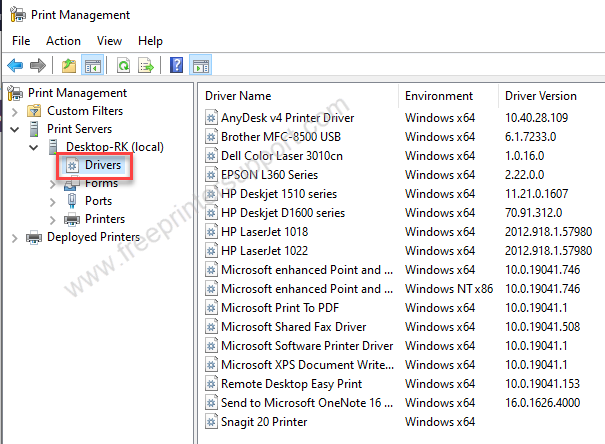
- Click on Drivers.

- Now look at the right-side pane and right-click on the printer model number you want to remove and click on “Remove Driver package..” I would suggest you to remove all the unused printer drivers from there. It is good practice to avoid driver conflict.

- Now go back to the left side pane and click on “printers” under “print server” and look at the right side pane and right click on your printer name which you want to remove and click on Delete. Don’t delete the default printer from here.

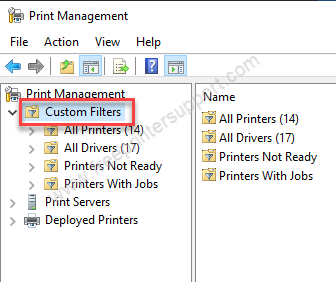
- Go back to Print Management and then click on Custom Filter.

- Click on “All Printers“. Then look at the right-side pane and do right-click on the printer name you want to delete and click on the delete option.

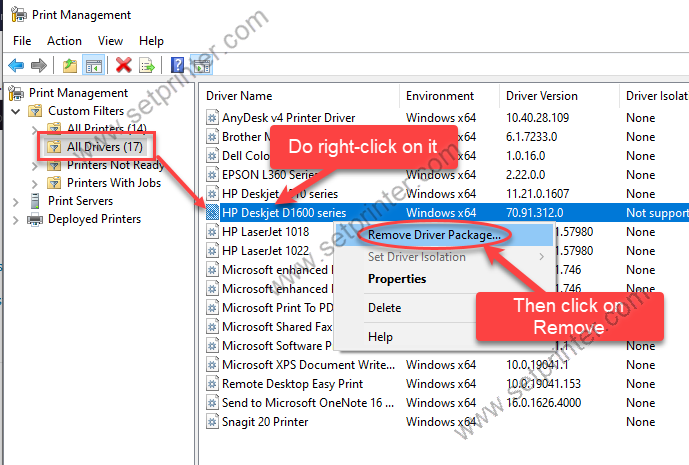
- Again, go back to “Custom Filters” and click on “All Drivers”

- Now, look at the right side pane and do right-click on the driver you want to delete and click on “Remove Driver package“.

- That’s it.
Step 3: Remove printer driver from System Registry
- Now, open “Run” again and type regedit and click Ok to open Registry Editor.
- Now Expand HKEY_LOCAL_MACHINE and then expand “SOFTWARE“

- and then expand “Microsoft”

- Expand to “Windows NT” and then expand “CurrentVersion”

- Here expand “Print” and then expand “Printer”
ComputerHKEY_LOCAL_MACHINESOFTWAREMicrosoftWindows NTCurrentVersionPrintPrintersHP Deskjet 1600 Series

- Now do right-click on the printer name of the drive you want to be deleted, and then click on the delete option.

- That’s it.


