
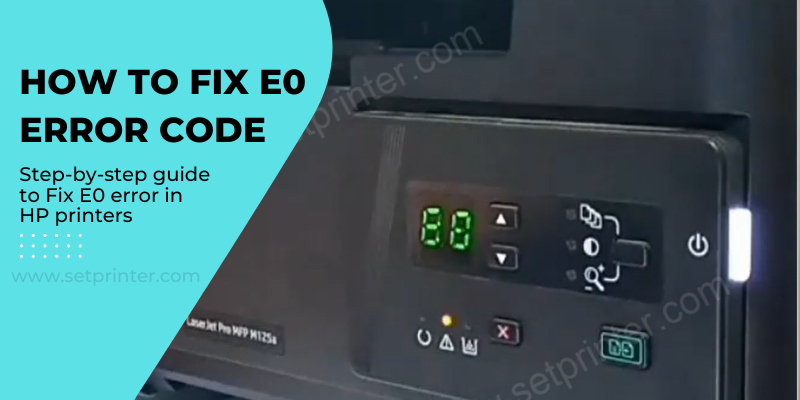
Hi, today I am going to talk about the E0 error code that usually appears on HP printer’s display screen. Here, I’ll show you the exact cause behind the E0 error code and the solution on how you can fix the E0 error code from your HP printer. You will see the exact meaning of the E0 error code – what it means. Let’s see.
Index:
Advertisement

See if the printer displays you any error code, it means the problem in the printer itself, if the error code displays on the computer screen it means the problem in the software or driver itself that helps to communicate with your printer hardware with computer software.
These error codes are here to help you determine the actual cause of your printer malfunction so that you can troubleshoot and repair your printer.
If your HP LaserJet printer has stopped printing and showing the E0 error code, then this guide is for you. In this guide, first, I will explain the root cause of E0 error, then I will explain how you can fix the E0 error in HP printers.
Let’s understand the E0 error message first and then find a solution to fix this E0 Message. To find out the cause, go to the cause section, to know the solution to fix this issue go to the steps given below.
What Causes E0 Error in HP printers?
The E0 error in HP LaserJet printers is caused when the printer is unable to load paper from the input tray for printing. There can be several reasons why the printer is unable to load paper from the paper tray, but broadly they can be classified into two categories which have been described below:
- Faulty Paper Sensor: This is the most common cause of this error. In this problem, the printer sensor is unable to get back to its original position after printing a page, thus, the printer thinks that the page is still getting printed and its unable to load the new page. Usually this happens because there is some dust or obstruction in the printer sensor system, which causes it to malfunction.
- Hardware Damage: If your printer has been used for many years or has experienced some sudden accident, then maybe some hardware has gotten damaged inside your printer, like the printer roller, paper sensor, etc. In such a scenario, the printer won’t be able to load paper for printing until the damaged part has been replaced with a new properly working part.
As you can see, the solution for hardware damage is to replace the damaged part, but faulty paper sensor issue can be resolved by carrying-out some minor maintenance work on your printer, which I am going to explain below.
How to Fix E0 Error in HP printers?
In order to fix the E0 error in your HP printer, you will have to clean and readjust the paper sensor of your LaserJet printer. You will have to carefully disassemble your HP printer by following the steps given below. As an example, I have shared the repair steps to fix the E0 error code from HP LaserJet Pro M125, M126, M127, M128, M1132, M1136 printers.
Steps
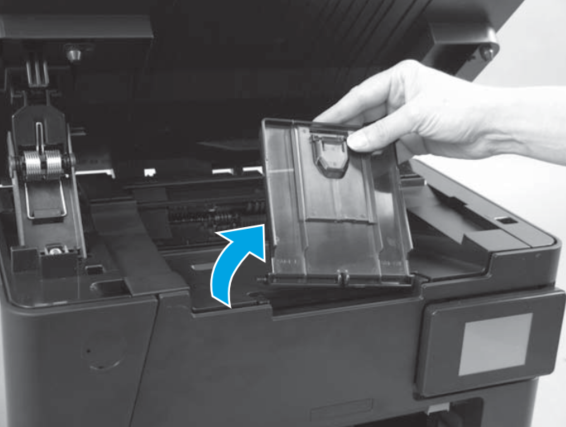
- Start by removing the paper-delivery tray. Slide the paper-delivery tray to one side, and gently flex it to release both the tabs attaching it to the printer.
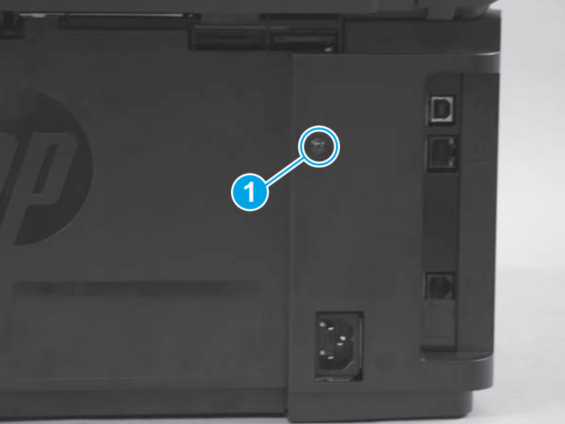
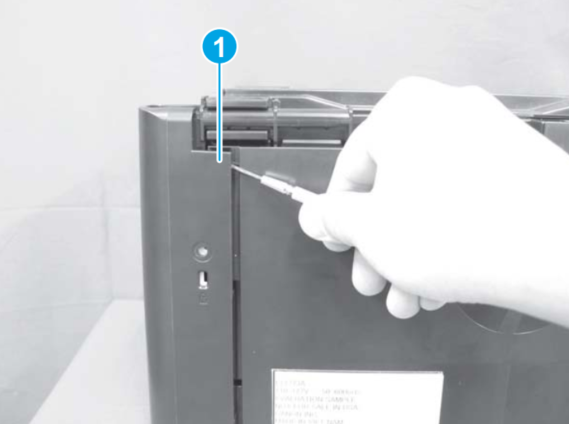
- Now, you need to remove the left cover of the printer. To do that, remove the screw on the left side of the rear of the printer.
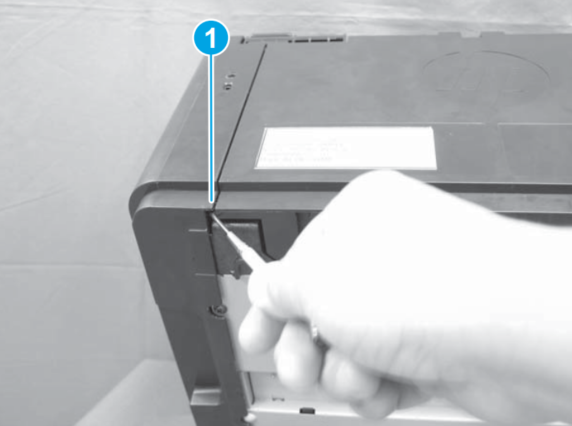
- Rotate your printer to its right side, then release one tab on the bottom of the left cover and remove the left cover.
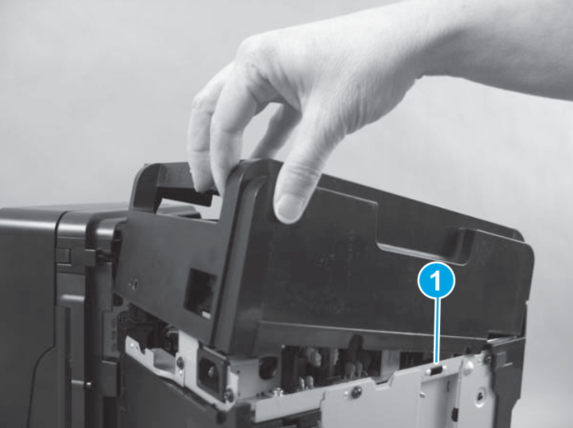
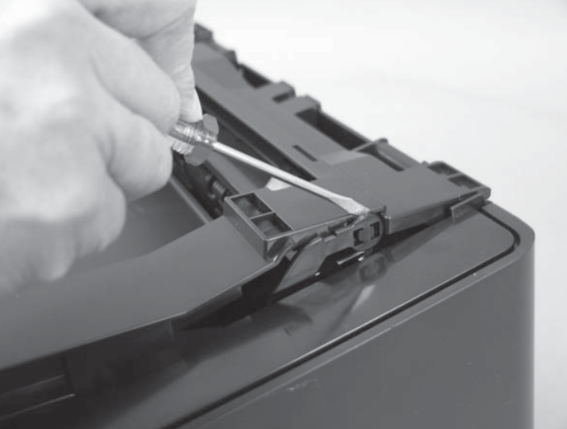
- Now, you need to remove the scanner assembly. To do so, disconnect the scanner cable shown with number 1 in the image below.
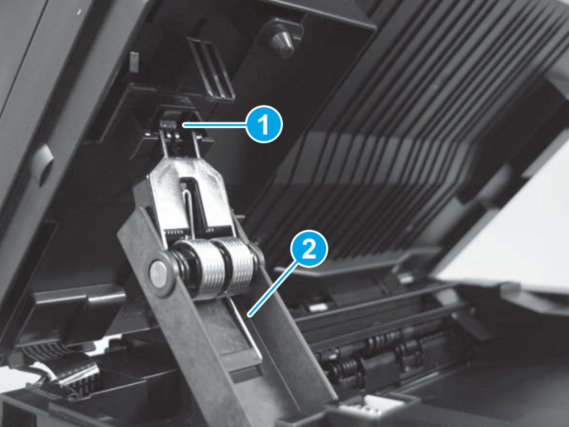
- Hold the scanner assembly carefully and release the tab shown with number 1 in the image below, then remove the scanner support which is shown with number 2 in the image. Since the scanner assembly is not captive to the printer, you can separate it from the printer base by opening it too far.
- Slowly push/pull the scanner connecting cable through the slot shown with number 1 in the image below.
- Lift the scanner assembly up and it will be completely separate from the printer.
- Now, you need to remove the cartridge door. For that, open the cartridge door of your printer and use a flat screwdriver to release the tab on the support arm on the right side of the door.
- Next, release the two hinges by pulling them outward on the supports as shown in the image below.
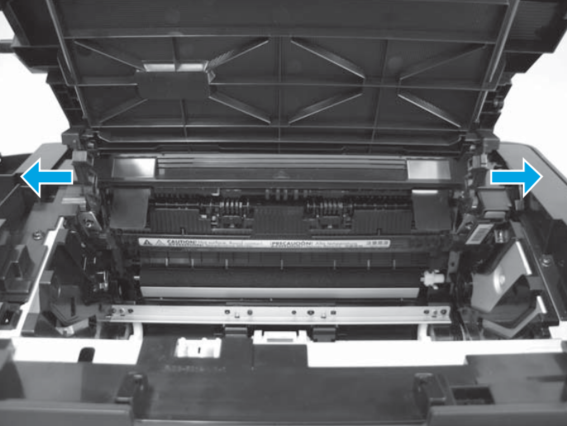
- That’s it, you can remove the cartridge door.
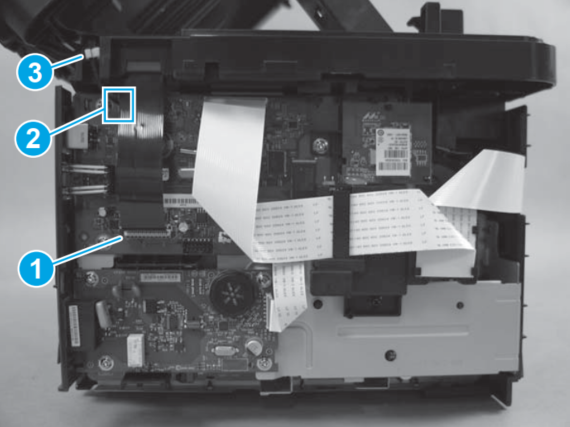
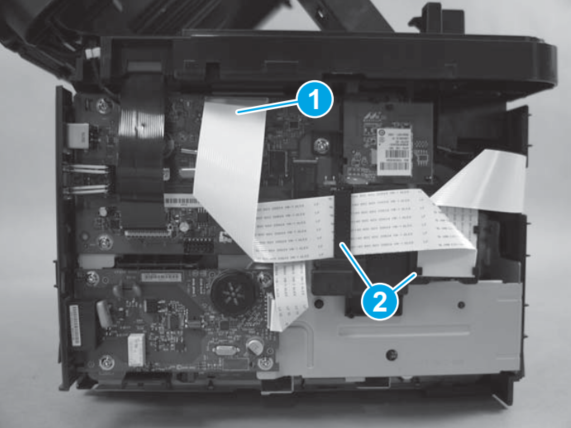
- Now, you need to remove the front cover of your printer. To do that, disconnect the control panel connecting the cable from the top as shown with number 1 in the image given below, then slowly slide the cable through the cable guide as shown with number 2 in the image.
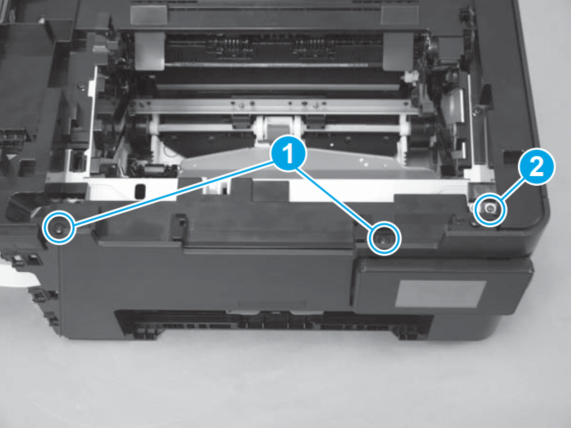
- In the top of the printer, remove the two black screws marked with number 1 in the image below and one silver color screw marked with number 2 in the image below.
- Rotate your printer so that the front becomes the top side, then from the bottom side of the printer, release the two tabs shown with number 1 in the image by using a flat screwdriver.
- Next, release the tab marked with number 1 in the image and the boss marked with number 2.
- That’s it, you can pull out the front cover of your printer.

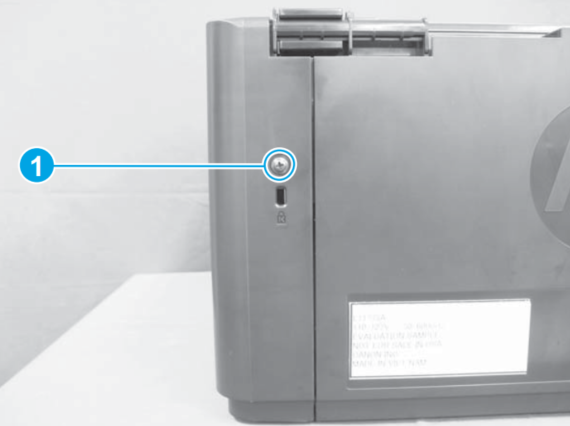
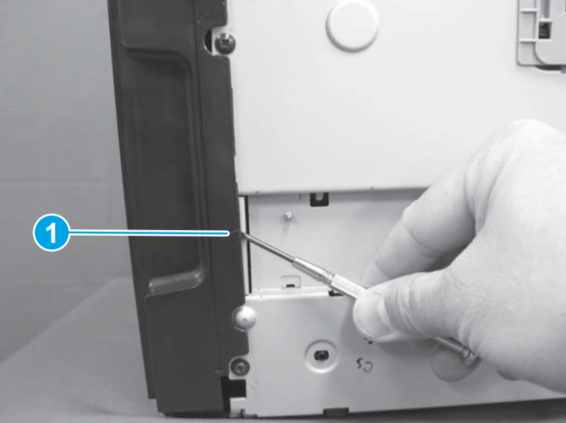
- Now, you need to remove the left cover of your printer. For that, remove one screw on the left side at the rear of your printer.
- Release the tab at the back of the printer to loosen the left cover.
- Rotate your printer onto its front side, then release the tab at the left side bottom of the printer.
- Release the second tab on the left cover at the bottom of the printer.
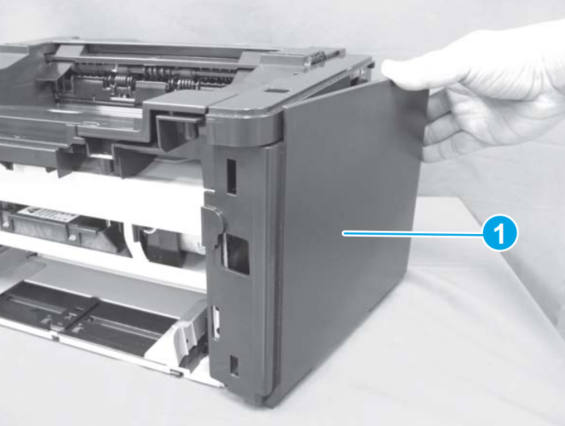
- Finally, pull-out the left cover of your printer.
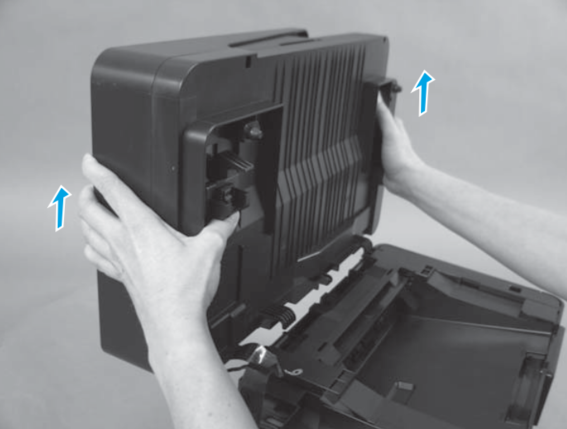
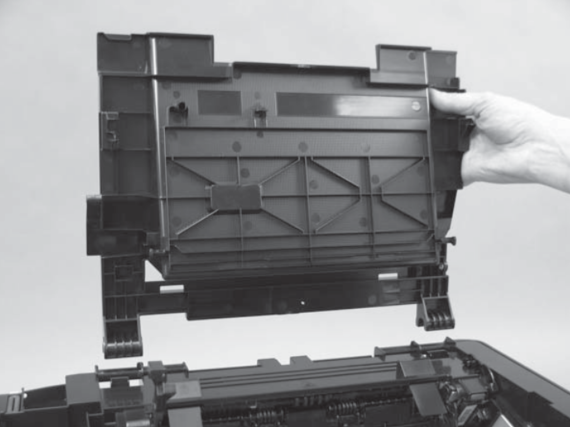
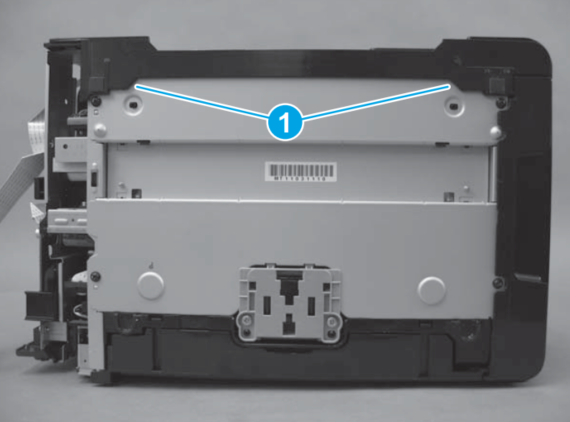
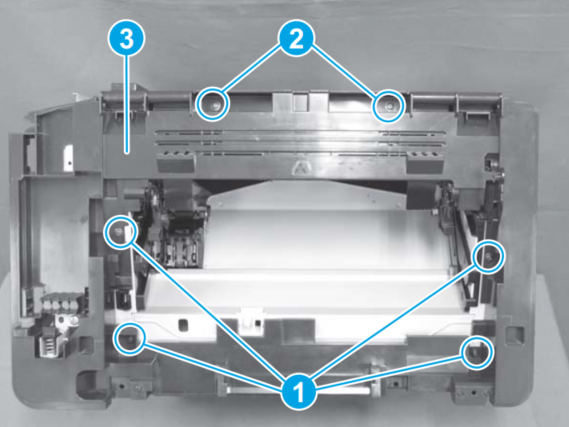
- Now, you need to remove the top cover of your printer. For that, remove the four black screws labeled with number 1 in the image below, then remove the two dull silver screws labeled with number 2 in the image. After removing all the above-mentioned screws, remove the top cover from the printer.
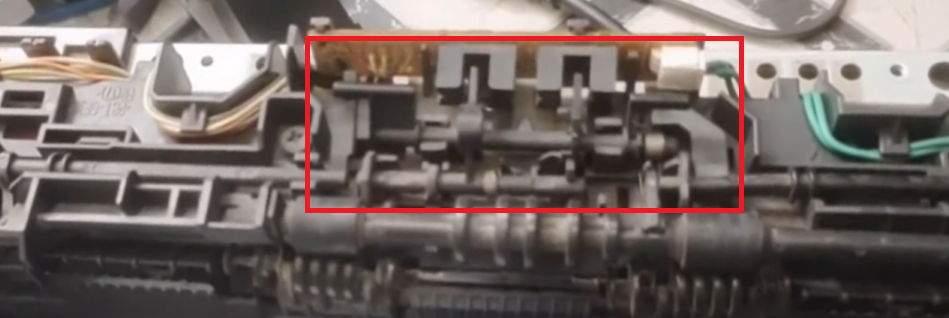
- Now on the top side of the printer you will be able to locate the paper sensor mechanism of your printer as shown in the image below.
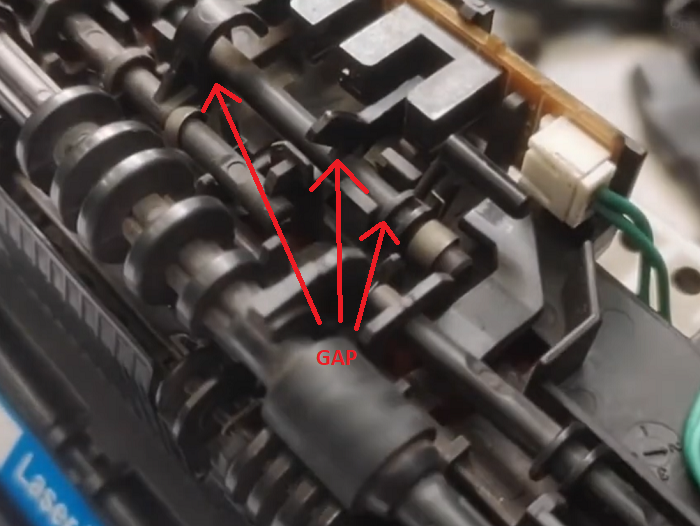
- In this paper sensor mechanism, you may find some gaps or obstructions. You need to clear the obstructions and make sure that the whole paper sensor mechanism is properly cleaned and is working properly, which means each time you gently lift the paper sensor it should get back to its original place without having any gaps.
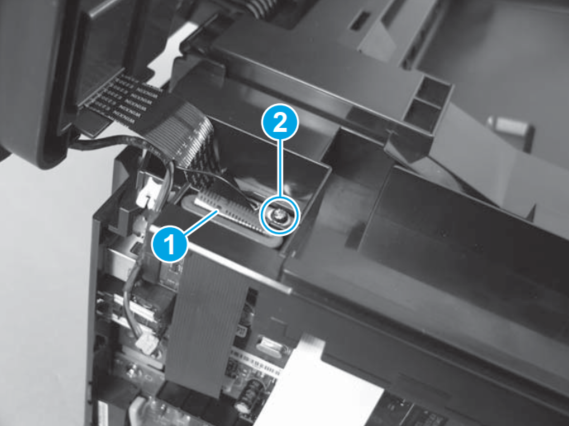
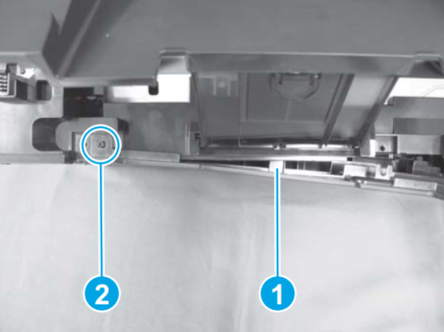
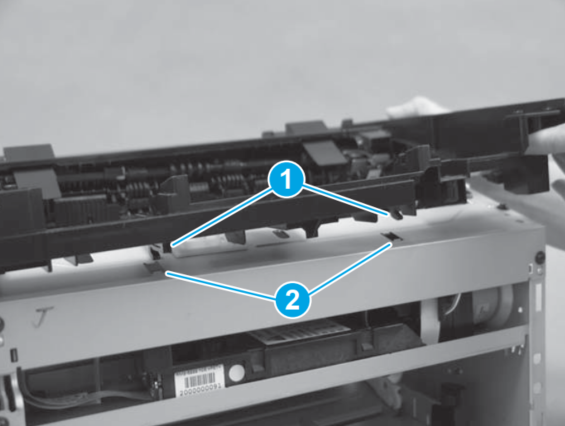
- After cleaning the paper sensors, reinstall the top cover of your printer by inserting the two tabs (marked with number 1 in the image) at the front of the top cover into the slots (marked with number 2 in the image).


Reassemble the rest of the printer and try printing a few pages. You will see that you have successfully fixed the E0 error in your HP printer.
Conclusion
Hopefully you have learned how to fix E0 error in HP printers. The above-mentioned repair process may seem to be a bit lengthy or tedious, but if you carefully read the entire process and apply it properly, then you will be able to fix this HP E0 error in a few minutes.
If you have any doubt or would like to ask a question please leave your question in the comment section down below, I’ll answer you there.