
Downloading and installing HP printer drivers can be a pretty straight-forward process if you know the proper method of accomplishing these tasks. However, many users are unaware of that method and end-up making silly mistakes. Therefore, in this guide, I will describe in easy steps how to download and install your preferred HP printer drivers so that even beginners can complete these tasks without making any mistakes.

Advertisement
How to Download the Latest HP Printer Driver
You may want to setup a new printer for multiple reasons, maybe you want to install your printer for the first time, you want reinstall an accidentally deleted printer, you have upgraded your computer OS and now you want to install corresponding printer drivers, or your old drivers have gotten corrupt. Whichever maybe the reason, you will have to download the latest version driver onto your computer. Here is how you can do it:
- Visit the HP Customer Support – Software and Driver Downloads page.
- In the search box, enter the name of your printer, as an example, I typed ‘HP Officejet 4630’, then press the ‘Enter’ key or click the ‘Search’ button.

- HP will automatically detect the OS version installed on your computer. If you want the drivers for this OS version, then go to step 8. If you want drivers for some other OS version, then go to next step.

- If you want to change the OS version, then click on the ‘Choose a different OS’ link.

- In the pop-up selection box, select your preferred operating system. I selected ‘Windows’.

- Now, select your preferred OS version. I selected ‘Windows 7 (64-bit)’.

- Finally, click on the ‘Update’ button.

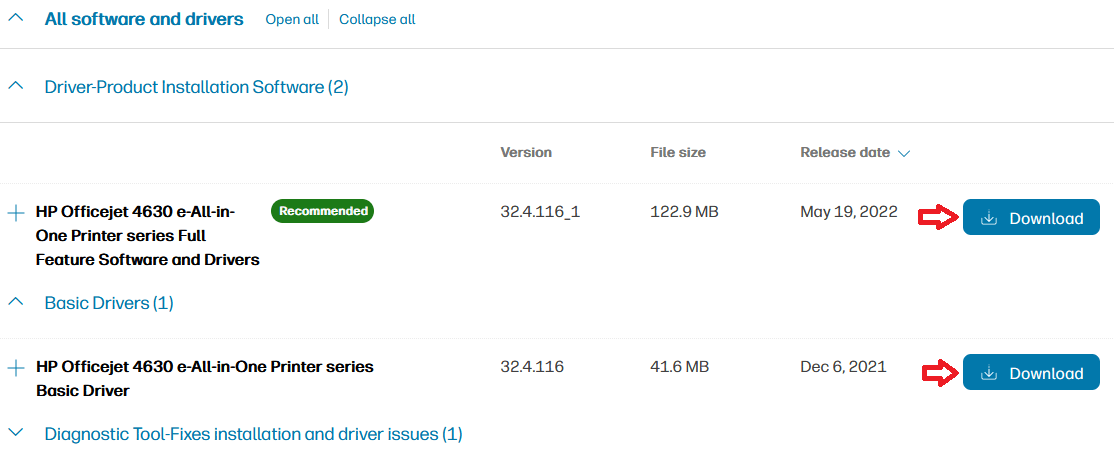
- Now you will see all the drivers and software which are compatible with the OS version. The driver options recommended by the HP for the OS version will be placed at the top of the list.

- There can be different driver and software options to select from, you should review all of them, then click on the ‘Download’ button to download the ones you find appropriate for your needs.


Once you have downloaded your preferred printer driver or software, then you will have to properly install them on your computer. In the next section, I will explain the step-by-step installation instructions for the HP printer drivers.
How to Install HP Drivers on Windows / Mac / Linux
You can setup your printer by using the built-in printer drivers of your operating system. However, if you have decided to install the latest version drivers, then you will have to install the drivers which you have downloaded from the HP website. As said before, you can either install drivers by using the automatic installer or you can install the drivers manually. I will explain both these methods below:
How to Install Full Feature HP Print Drivers in Windows
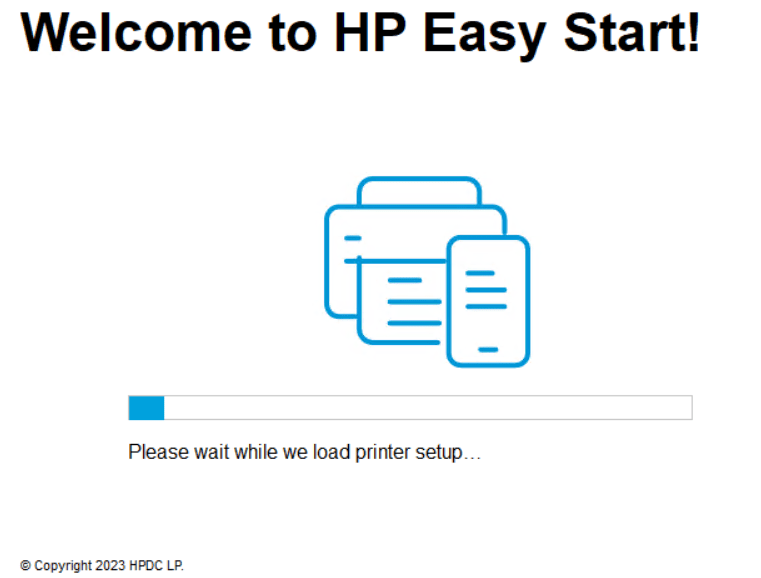
Now a days, HP provides an automated installation application for HP printers, called the HP Easy Start. Before starting the installation of your printer make sure that your printer is properly setup and powered on, but don’t connect your printer to your computer right now it will be done during the installation process.
- Run the downloaded full feature driver file or the HP Easy Start application and wait for the printer setup files to load on your computer.
- Click on the ‘Continue’ button to accept the license agreement and the default printer settings.

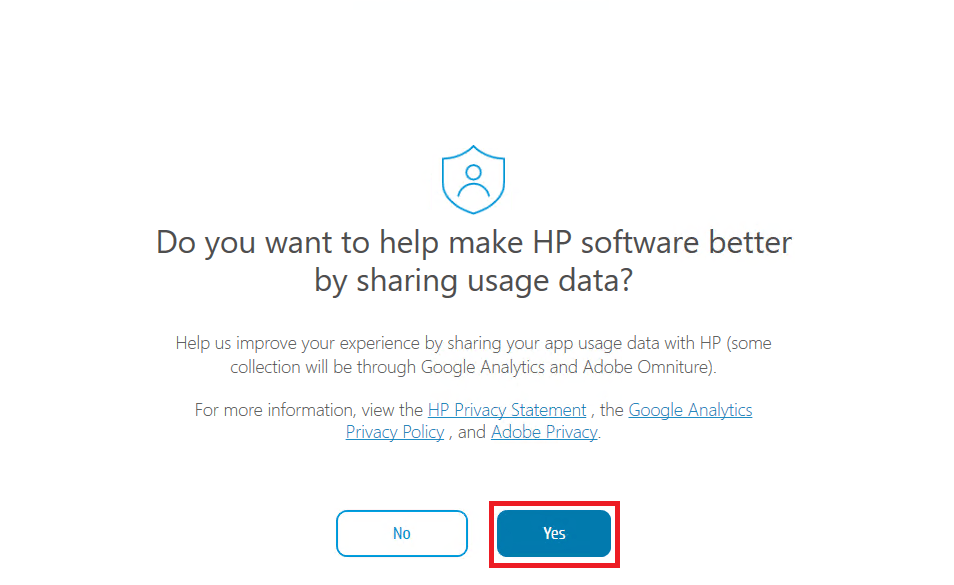
- You will be asked to share your printer application usage data with the HP website. I would recommend sharing your data as it will help you get better updates from the HP. Click on the ‘Yes’ button to share your data. If you don’t want to share your data, then click on the ‘No’ button. Your decision will have no impact on the outcome of the driver installation process.
- Now, connect your HP printer with your computer by using a USB cable, then click on the ‘Continue’ button.

- Easy Start program will detect your printer and display its detail on the screen. If the printer details displayed are correct, then click on the ‘Continue’ button. Otherwise, click on the ‘My Printer is Not Shown’ button and follow the instructions accordingly.

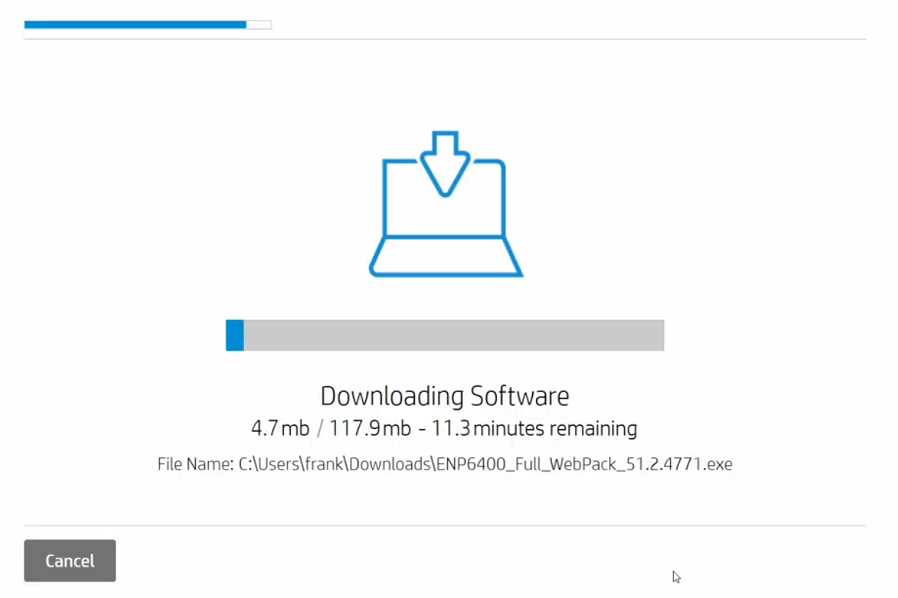
- Easy Start program will search for the drivers and software available for your printer, wait for this process to complete. Select the ‘Full software and drivers’ option, then click on the ‘Continue’ button.

- Wait for the download of the drivers and software to complete.
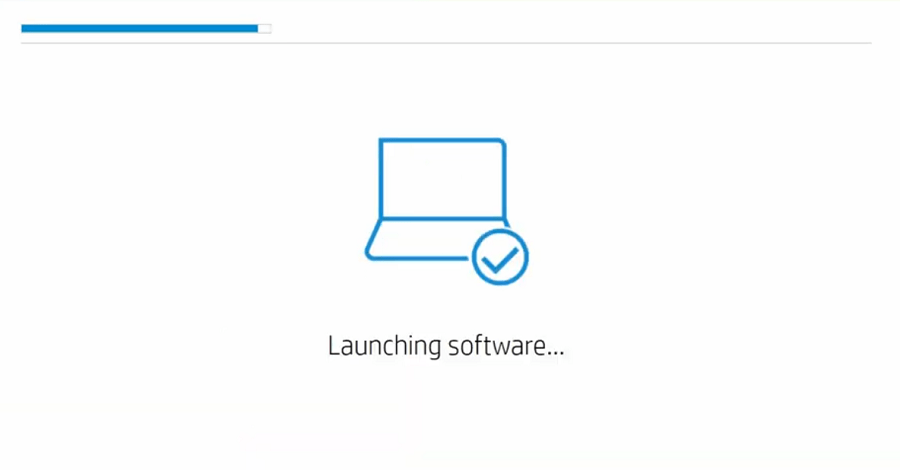
- Wait for the program to launch the software.
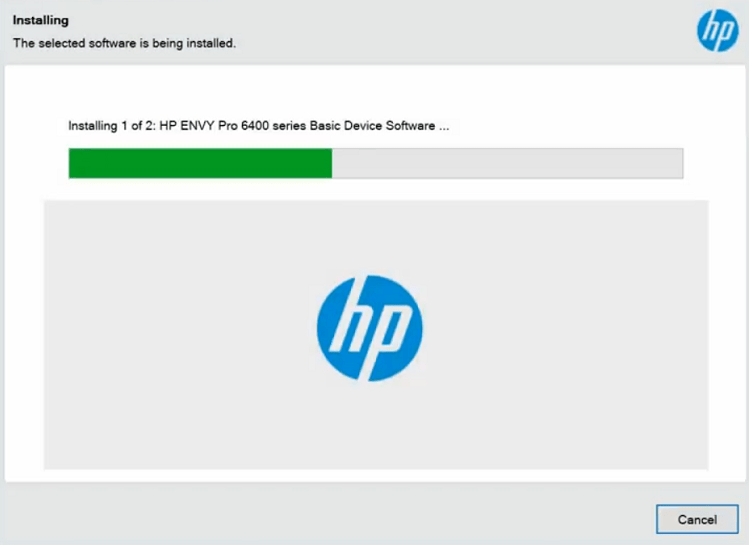
- Select the software which you want to install on your computer, then click on the ‘Next’ button. Read and respond to the following screens to set your personal preferences and proceed according to the displayed instructions.

- Wait for the setup program to install the necessary drivers and software on your computer and setup your printing device.
- When you see the message that setup is complete, then close the setup program.


That’s it, you have successfully installed your full feature HP printer drivers on your computer and your printer is ready for use.
How to Install HP basic printer drivers (inf drivers) in Windows
If your printer driver doesn’t come with an automatic installer or you have decided to install your printer with its basic / INF driver, then I will explain the installation process in the steps given below. Before starting the driver installation, extract the driver files into a folder on your computer and note down its location as you will need these details during the installation process.
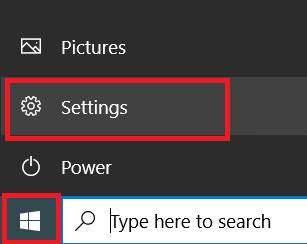
- Click on the ‘Start’ button, then select the ‘Settings’ option from the menu.
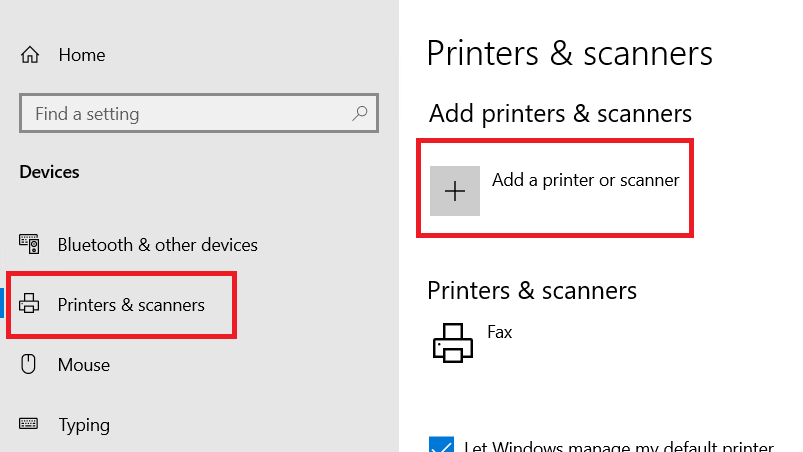
- In the Settings page, click on the ‘Devices’ option.

- In the Devices page, choose the ‘Printers & scanners’ option in the left pane, then click on the ‘Add a printer or scanner’ option.
- Wait for the ‘The printer that I want isn’t listed’ link to appear, then click on it.

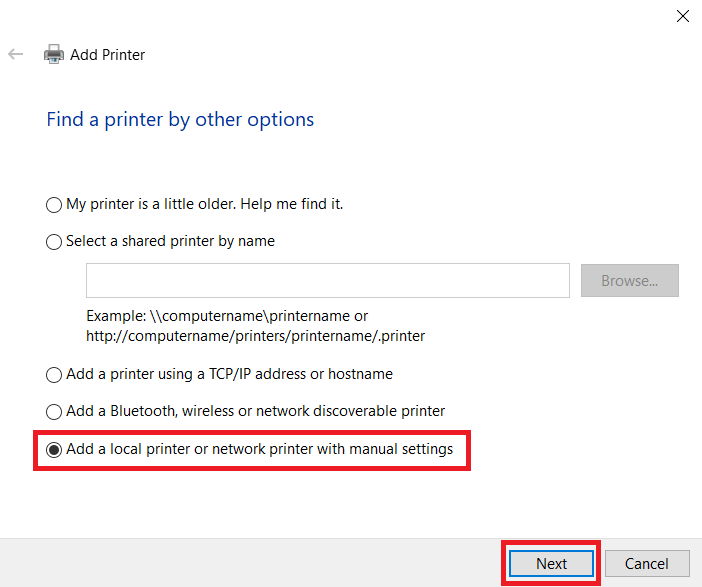
- In the Add Printer wizard, choose the ‘Add a local printer or network printer with manual settings’ option, then click on the ‘Next’ button.
- Select your preferred port from the port list, as an example, I have chosen the ‘USB’ port, then click on the ‘Next’ button.

- Click on the ‘Have Disk’ button, then in the ‘Install from This’ window, click on the ‘Browse‘ button.

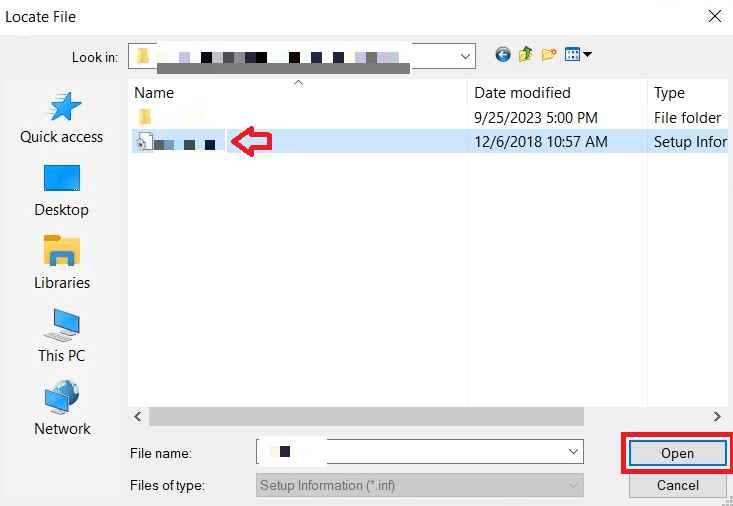
- In the Browse window, go to the folder where you have extracted the driver files, then locate and select the setup information (inf) file of your printer driver. Finally, click on the ‘Open’ button. In the next window, click on the ‘OK‘ button.
- In the list of printers, select your printer model, then click on the ‘Next’ button.

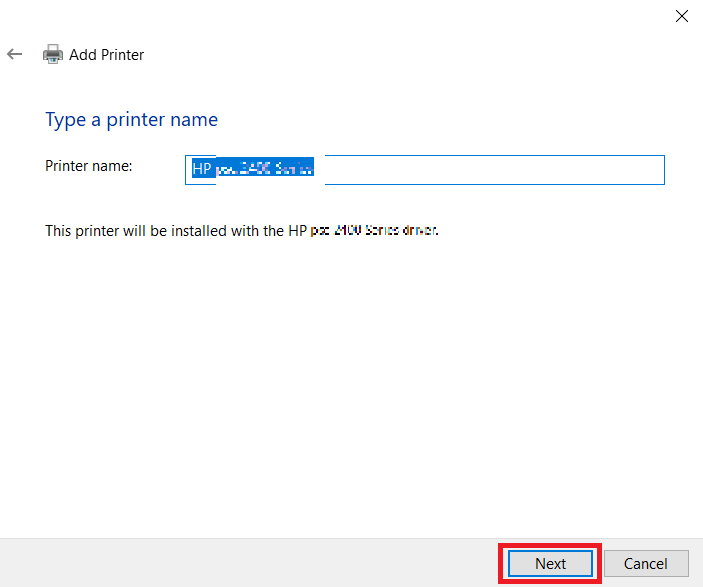
- If you want to change the display name of your printer, then you can do so in this screen, Finally, click on the ‘Next’ button and wait for the drivers to install on your computer.
- If you want to use your printer over a network, then choose that option and enter the relevant details. Otherwise, select the ‘Do not share this printer’ option, then click on the ‘Next’ button.

- When you see that the printer has been successfully added to your computer, then click on the ‘Finish’ button to close the installer.
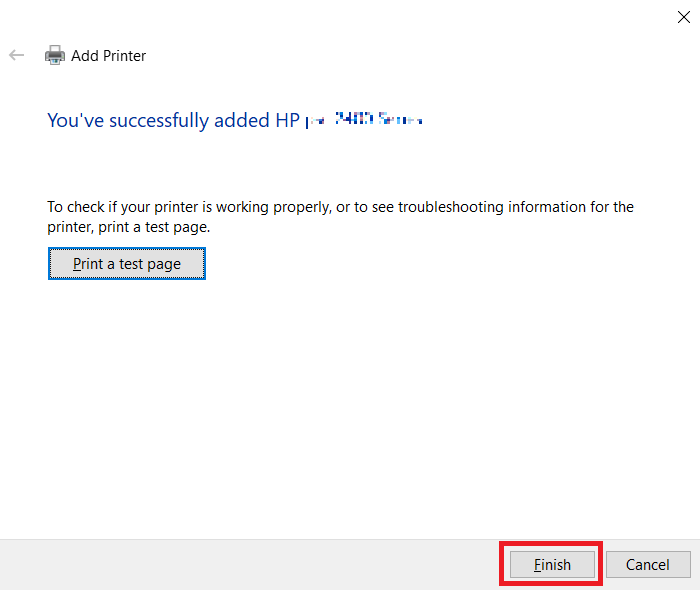


That’s it, you have successfully installed the basic / INF printer driver on your computer and your printer is ready for use.
How to Install full feature HP printer drivers in Mac
Mac comes with built-in printer drivers which can be used for installing HP printers, but when you decide to install the latest version drivers yourself, then you may get access to additional printer and scanner support features. Therefore, in this guide I will describe the installation of the HP printer drivers on a Mac computer.
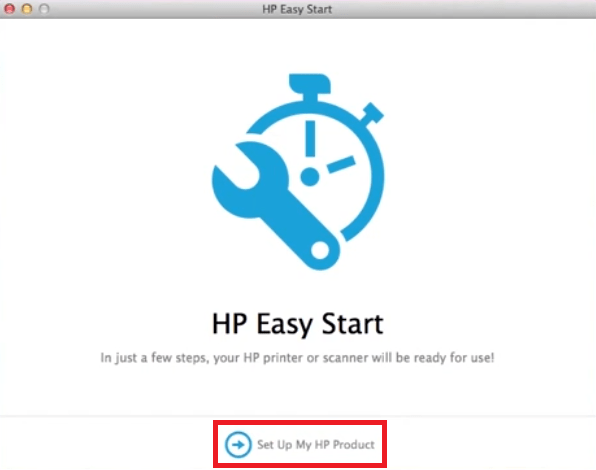
- Launch HP Easy Start, then click on the ‘Set Up My HP Product’ link.
- In the Agreements and Settings screen, choose the ‘I have reviewed and accept the agreements and settings’ option, then click on the ‘Continue’ button.

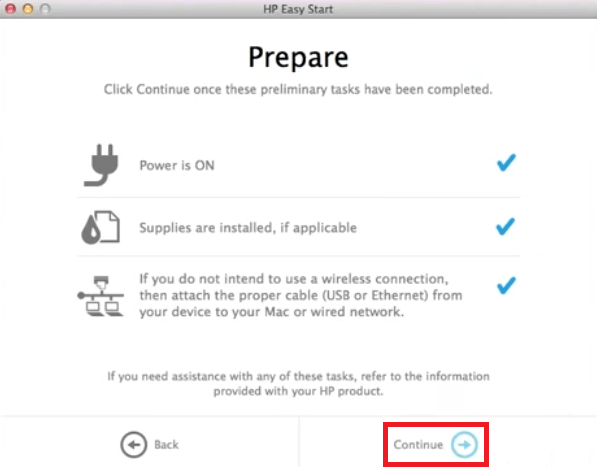
- Make sure your printer is properly setup, connected with your computer via USB cable, and is powered on. Wait for the Easy Start app to verify everything is alright, then click on the ‘Continue’ button.
- Select your HP printer, then click on the ‘Continue’ button.

- Select your current location and preferred language,then continue. In the printer-specific agreements and settings screen, select the ‘I have reviewed and accept the agreements and settings’ option, then click on the ‘Continue’ button.

- Select the purpose of installing this printer and continue. In the Install screen, select the software and drivers you want to install on your computer, then click on the ‘Install’ button.

- Wait for the installation of the drivers and software to complete, then click on the ‘Continue’ button.

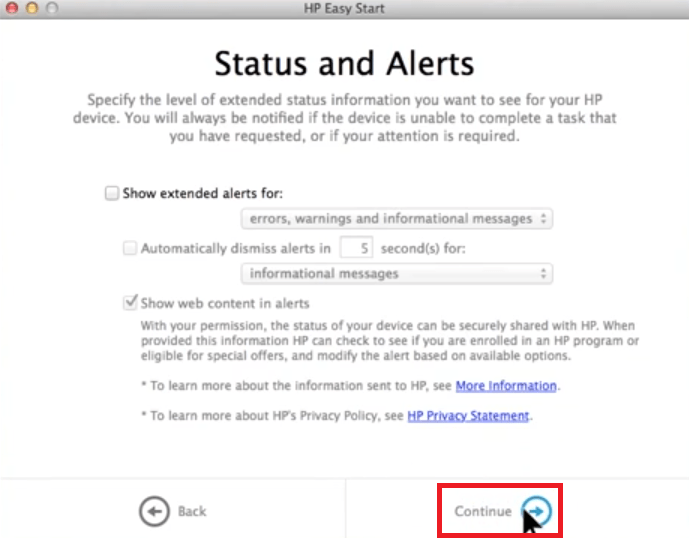
- In the Status and Alerts screen, you can choose the type of alerts you would want to receive from the HP. Click on the ‘Continue’ to proceed with the default settings.
- In the Enable Printing screen, click on the ‘Add Printer’ button.
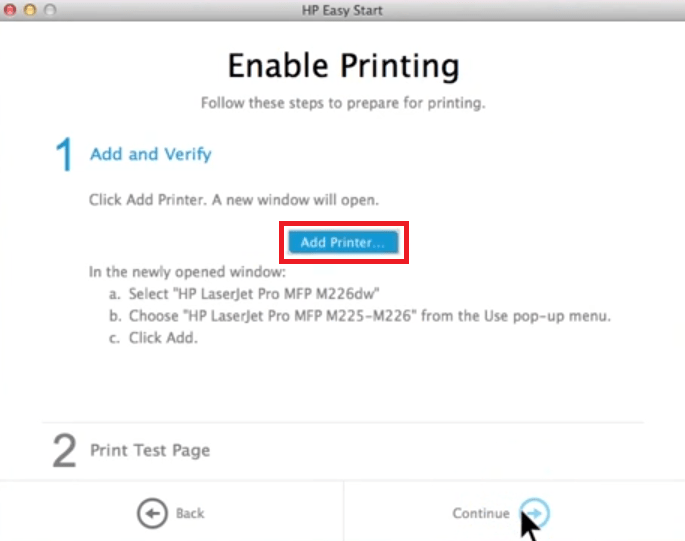
- Select your preferred printer from the list of printers, then click on the ‘Add’ button.
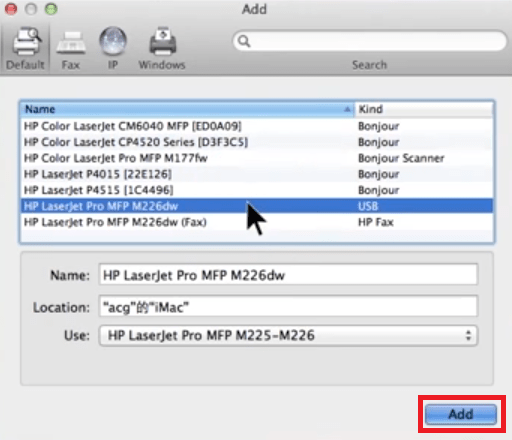
- If you want to print a test page, then click on the ‘Print Test Page’ button. Finally, click on the ‘Continue’ button. Read and respond to the subsequent screens to set your personal preferences and proceed accordingly.
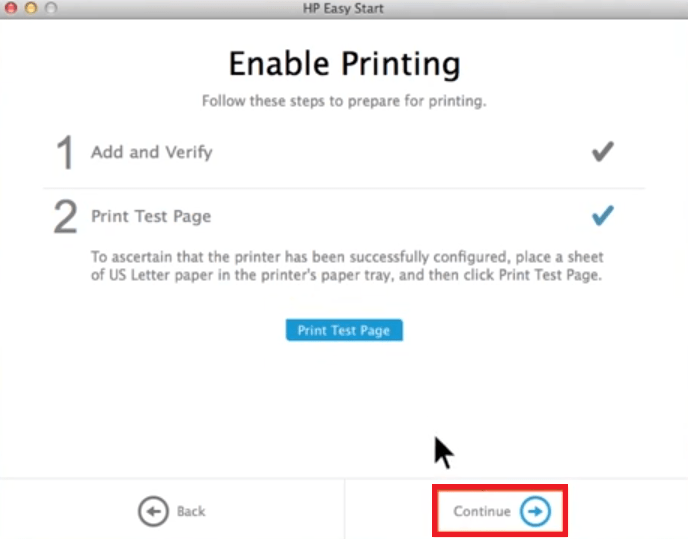
- When you see the message that all the essential software has been installed, then you can click on the ‘Continue Online’ button to complete the online configurations. Otherwise, click on the ‘Close’ link to complete the driver installation process.


That’s it, you have successfully installed the HP printer drivers on your MacOS computer and your printer is ready for use.
How to install HP printer drivers in Linux
When it comes to installing the HP printer drivers on Linux/Ubuntu, then you have two options. You can either use the automatic installation process or you can download the latest HP Linux Imaging and Printing (HPLIP) driver package and install it manually on your computer. HP is one of the few printer manufacturers which provides driver package for Linux.
1) Automatic Installation
Make sure that your HP printer is properly setup, powered on, and connected to your computer via USB cable. Follow these steps if you want to install your HP printer without using the Linux Terminal:
- In the menu, click to open ‘Settings’ option.
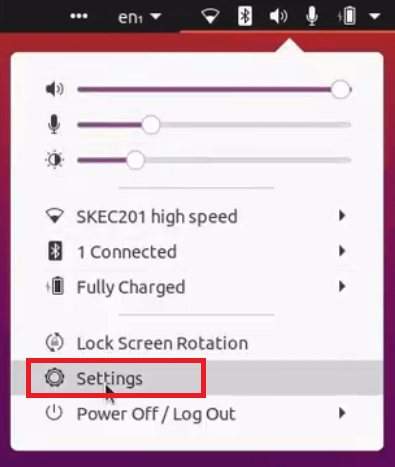
- In Settings window, choose ‘Printers’ option in the let pane, then click on the ‘Add’ button in the top-right corner.

- Wait for the program to detect your printer, then select your printer from the list of printers and click on the ‘Add’ button.

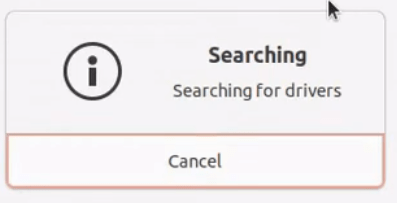
- Wait as the drivers of your printer are being searched. If its required, then new drivers will be downloaded.
- Finally, you will see the message that your printer has been added.


That’s it, you have successfully installed your HP printer on your Linux/Ubuntu computer.
2) Manual Installation
Manual installation of the drivers can be tricky because you will have to use Linux Terminal and execute commands manually. Before starting the installation process, download the latest version of the HPLIP file from the HP website. Also, switch on your printer and connect it with your computer by using a USB cable. Read the steps given below carefully to avoid making any mistake:
- Go to the folder where the HPLIP file was downloaded, then right click in the empty space and select ‘Open in Terminal’ option from the menu.

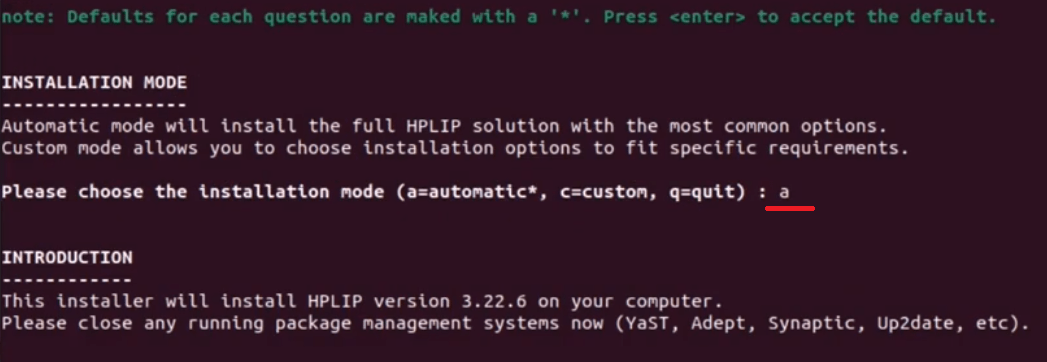
- When inside the Terminal, login as super user as subsequent commands can’t be executed unless you have root access. Now, type the command ‘sh<space><filename>’ in my case filename is ‘hplip- 3.22.6.run’. Finally, press the ‘Enter’ key and wait for the content of file to extract on your computer.

- You will be asked to choose the installation mode, type ‘a’ for automatic installation, then press the ‘Enter’ key and wait for the installation process to complete.
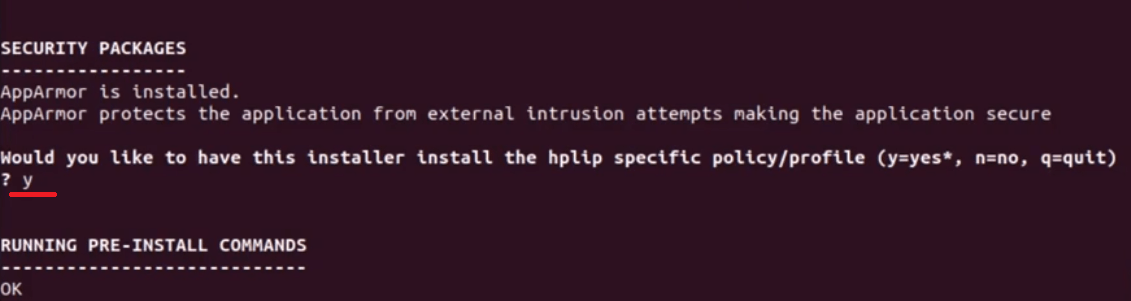
- You will be asked to confirm your Ubuntu version, enter password, etc., just complete these steps. When you will be asked to install the hplip specific policy/profile, type ‘y’ to agree, then press the ‘Enter’ key and wait for the installation of the policy/profile to complete.
- You will be asked to install the missing dependencies, type ‘y’ to agree, then press the ‘Enter’ key and wait for the missing dependencies to install on your computer. Read and respond to subsequent commands according to your personal preference, then restart your computer.


That’s it, you have successfully installed the HP printer drivers on your Linux/Ubuntu computer.
Types of HP printer driver installers
Printer driver translates your computer data into a format which is understandable for your printer. Each printer is built with a different hardware and software. Therefore, HP offers multiple ways of installing the printer driver on a computer, which can be broadly classified into two categories:
- Drivers with installer: These types of drivers come with an in-built installer, which makes the installation process entirely automatic. In this installation method you get the option to install additional printer software on your computer, which makes them full feature drivers.
- Drivers without installer: These types of drivers don’t come with an installer, which means you have to extract their files into a folder, then install it manually by using its INF file. This process is mostly used for installing the drivers of old printers. Since you can only install basic printer drivers on your computer with this method, you don’t get the option of installing any additional printer software.
If an improper printer driver is installed on your computer, or if the driver is installed improperly, then your computer will be unable to identify your printer or complete any kind of printing work. Therefore, downloading the right printer driver and following the right method of installing that driver, both are equally important.
How to protect your HP printer drivers
Installing a corrupted driver will have an adverse impact on the performance of your printer and even lead to BIOS crash, which means you may lose all your drivers. However, you can avoid such a situation by taking some precautions.
- Install security program: Always keep an effective security program like firewall, antivirus, anti-malware, etc. installed on your computer. This will avoid a situation where an outside program can corrupt your printer driver.
- Download drivers from HP: Preferably, you should download drivers directly from the HP website. Always remember that HP provides its drivers and software for free and if anyone is charging for them, then you should avoid their services.
If you follow the instructions given in this guide, then you should have no problem in downloading the right printer driver for your HP printer and also in installing them properly on your computer.